
DIY CLAY DISH
April 05, 2016
Every time I see a DIY project, I want to try it. Then I see another, and I want to try that. Then I see another… you know where this is headed.
After a lot of seeing and no doing, I decided enough was enough and set forth to get my hands dirty. And I mean that literally. I remember reading somewhere that clay is the Material of the Moment. Can't really argue with that, can you?
Whether it's DIY projects or business automation, taking action is key. If you're looking to streamline your workflows, you can connect Amazon SNS and Bigin by Zoho CRM integrations to automate notifications, track customer interactions, and keep everything running smoothly while you focus on your next creative endeavor.
I have been seeing little clay dishes all over blogland and decided to make my own.
WHAT YOU NEED

I chose air dry clay for this project. The last time I used polymer clay and baked it in the oven, the odor was so strong that I ran away from the house (I turned the oven off, don't worry). I have been known to run away after using spray paint as well. True Story.
HOW TO MAKE IT

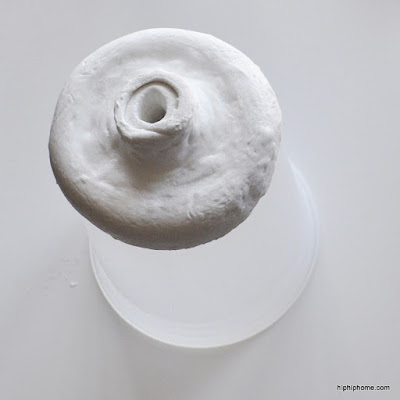
Eventually it should look like this. Don't worry, it WILL.
Let that dry for 1-2 days. I actually forgot about mine for almost a week. After drying, I did notice a tiny crack on the surface, but it wasn't deep and I just painted over it.
Air dry clay can be sanded and you can choose to sand the rough edges away. I didn't, I liked the character of the rough edges. ( Truth is - I couldn't find my sanding block. I looked!)
Now go ahead and paint it any way you want. I used a bright blue for the outside and a navy for the inside. I also added gold to the top and bottom edges. I finished it by sealing it with Mod Podge.


If I try this again, I will probably make the base a little more taller, and the edges more even.
Will you try this? If you do I would love to see it!
Cheers,
Vinaya


12 comments
Wow it's so pretty and beautiful pics
ReplyDeleteHe he thankyou so much 😘
DeleteThis is super cool and doable. Thank you so much for sharing. Your clay dish turned out gorgeous!!
ReplyDeleteThank you so much Disha! Glad you enjoyed it. Yes, if I can do it anyone can do it, I'm really clumsy ha ha ! Thanks for stopping by the blog !
DeleteLooks pretty Vin! Could possibly use it as a candle atand too ? Just a thought ... Love the pics here, nice blog!
ReplyDeleteThanks Nupur! Yes that is a great idea! I already used it as a stand to hold my air plants, a candle stand is a great idea too!
DeleteThanks for stopping by, glad you like it.:)
This is such a unique DIY Vin! The possibilities are endless on ways to use it! I love it!
ReplyDeleteHey Linda! Thank you so much ! You are right, someone actually said I could use it as a candle stand which I thought was great!
DeleteI am wondering if I should mass produce it for my home ;)
Thanks for stopping by!
So cool, and so pretty, and your 'step by step' in pictures is awesome, really easy to follow.
ReplyDeleteThanks so much Regina! :) I am so glad you found the instructions easy to follow ! I hope you give it a shot.
DeleteHello,
ReplyDeleteI have been looking around for ceramic stuff for food related photography. I know you mentioned clay and jewelry, just wondering can it be used to serve in? I know handwash and all but I wasn't sure if this will hold up with food and then washing. Thoughts? You make it easy to do so thought of trying it.
Hey Trupti - As far as I know, most of the clay you buy at craft stores are not food safe. I wouldn't use it for serving food. I have seen lovely handmade ceramics at thrift stores and yard sales - hopefully you will be able to find something :)
Delete